A. The Wall Site
Like any landscaping project, selecting the wall site is an important step. You want to try and work with the natural landscape as much as you can.
Proper planning to build your landscape walls in the right spot can save you a lot of digging or filling.
Landscaping a slope
Some of the different forces when landscaping a slope you will have to account for are:
Hydrostatic pressure which (in the simplest form), is the pressure exerted from a fluid due to gravity.
Frost heave is the complex series of events that results from the freezing and expanding of water.
Soil creep, or downhill creep, is the ability for soil and rocks to move down slopes in relation to friction, and gravity.
Slide planes can be created below the surface when heavy amounts of moisture accumulate. This moisture creates a slippery film that will eventually give way to the weight above it causing a gravity slide. (This can happen where water hits a clay surface and can't soak in anymore).
You don't need to fully understand the technical information behind each of these forces. (I don't, and probably never will.) You do need to know they exist when you are building a retaining wall and what techniques prevent them. The steeper the slope, higher the wall, or more water you are dealing with, the more you will require the services of an expert.
Construction Permits
Before you begin any work in your yard, it is essential to first check with your city or town about permit requirements for building a landscaping wall. In most cases you won’t need one, but this seems to be changing in a lot of cities.
It could be for different reasons like ensuring construction safety, or to keep track of major improvements that increase the value of your property. (The tax assessors don't want to miss a dime when it comes to collecting more taxes).
It’s always up to you to confirm this in your area.
Also, remember that we mentioned in the introduction that walls usually over four feet in height may need to be engineered. Here are some other things to consider.
1. Basic Design Principles
I don’t think it is necessary to plot out your dimensions to scale on graph paper. (Although you are welcome to do it). Basic sketches (bubble diagrams) with measurements and notes to work from will do fine for do-it-yourselfers.
I won’t get into great detail about designing because it is a whole course in itself, but there are still some pretty basic principles that you should know about.
If you are incorporating plants or other features around your landscaping wall, try to follow these basic guidelines. Most landscaping books will explain these principles to you. If you have a few books lying around the house, it won't hurt to give them a quick read.
You can also purchase some of the homeowner friendly design programs available.
Colour
or "color" (depending on where you live in the world), balance, simplicity, line,
rhythm, unity and proportion to name a few, are all design principles that must be considered.
Generally, informal designs are more often flowing curves
and usually look better while working with natural stones. Straighter
lines (formal designs) are more suited for working with manufactured
products. Remember that it is a little more challenging to square things
off with natural stone.
Repeating patterns, shapes, and colors gives a nice rhythm and flow to your yard. If you are planting along or around your wall site, try to remember this to give your design unity.
Don’t build landscaping walls too high or too long. Keep the size in proportion with the rest of the yard or house whenever possible. You want balance in your design.
I have also found that darker colored stone walls tend to be more versatile than light colored stone walls. They go with just about any surrounding much better. This depends on the colors in your particular yard, but lighter colors contrast more than darker ones.
Transition zones are areas in between landscaping features that are connected to your wall site. Grass, buildings, patios, gardens, walkways, etc., and they will need to be connected to your wall. A good way to do this is using buffers like decorative rock, or a garden itself.
All your work will have to be sequenced in the right order to save you time and money. Proper construction planning is essential.
Buffers like decorative rock beds are also great ways to make up differences in small grade changes. Make sure you have your transition zones planned in advance so you can prepare for them when you excavate, and check out our module on Edging and Decorative Rock. If you are using any low voltage lighting in your project, don’t forget to plan for buried lines in the excavation stage.
Also, design your wall site to be yard friendly and practical. This means making sure you consider moving and mowing around the sides of the wall or stairs to get up and down.
What are your future landscaping plans, and how will this project affect them?
To help you plan where your wall is going to be, paint out your lines with inverted marking paint (available at most hardware stores), or a garden hose.

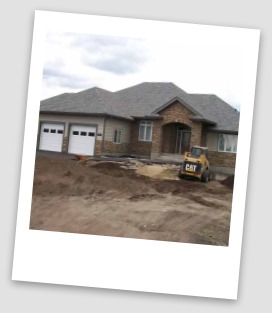
Once the wall location is marked, (See landscape paint in picture above), you should finish as much work as you can behind it. Efficiency in your installation sequence can save you a lot of time. In this photo, work to the garden bed is completed before the wall to save time and possible damage to the wall.
Always have a plan to install all the features of your project in the right order. Softscaping may come after the hardscaping, but prepare the bed before you build the wall, or you will be doing it all with shovels once the wall is built.
2. Excavating
So you don't end up over on your budget if you are excavating a large amount of waste soil and rock, make sure you are aware of dumping fees in your area. This is a cost that is often overlooked.
Call your local waste or landfill number to inquire about their charges. Some landfills may have a pretty big charge for disposing of dirt if there is sod in it. You may have to separate the sod from the dirt or clay when you are excavating.
This can save you money. Most landfills will take clean fill at a fraction of the cost if not for free.
For example: my city charges $85 per ton for sod scraps and dirt mixed together, but only $3 per ton for clean fill.
NOTE: some cities may even require you to have a dumping permit.
Some cities, towns and rural areas have NO fees at all.
I suggest you do some searching for someone that is looking for clean fill, if you have to remove large amounts of dirt from your wall site. Sometimes you may get lucky enough to have them come and take it away.
I have always found that certain jobs are just better left for others, and excavation is one of those jobs.
I have someone that does my excavation work for me. Call around to find the best price. It can cost you 3 or 4 hundred dollars just to rent a bobcat to dig it up. This still leaves you with a pile of dirt in your yard that you have to get rid of.
Or,
You can have someone come in, dig it out, and take it away the material for about the same amount. They will be much faster at it. Some things just aren’t worth doing yourself to save a buck.
Plan your work according to the weather when you can. Heavy equipment can make a mess in wet weather.
3. Be aware of all forces of nature around the site
This includes drainage from rain directly on the ground, or any downspouts from buildings. Also be aware of any current tree roots and projected future growth.
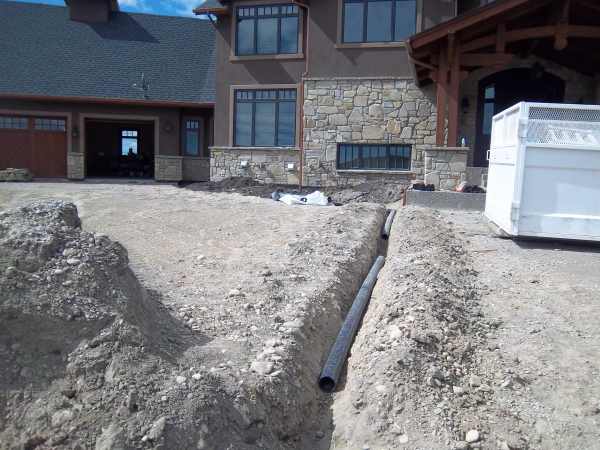
In this picture above, the drainage is also installed before the wall is built and the driveway is paved. Once again, proper planning is essential.
4. Be aware of all man-made objects that may impact your wall site or design.
I would suggest taking some pictures of your site from different angles. Review the pictures so you take in the big picture. Most people don't consider man made things that can impact your design.
ALWAYS call before you dig. They will come out and flag and/or landscape marking paint your site as to where these utilities are buried. These services should be free to you by utility companies and may save your life.
It is not uncommon to have to modify a design to avoid underground drainage, irrigation, water, sewer, septic systems, gas, electricity or other buried cables.
If you have in-ground irrigation make sure you call your service company to map out where your lines are. (These can easily be cut with a shovel.) They may also want to make changes to the system and zones to benefit you.
If you are planting in and around your wall site, they may want to install some additional irrigation to feed your new plants.
5. Pre-plan for materials
Pre-planning can save you time from having to move supplies multiple times. (I have learned this lesson more than once). You will be working from different piles of gravel, sand, or dirt at the same time.
If you have materials delivered to your wall site, make sure you are there when they are delivered, or they will be dumped anywhere. If you can't be there, let the supplier know where to dump materials by marking a big "X" or placing a tarp where you want them. Also, expect the materials to be there for a while. Make sure they are not going to cause you grief if things take longer than expected.
The same thing goes for excavation materials to be disposed of. If you need to use the lawn, put down some heavy grade tarps to protect it. (Expect to have rips, tears and possibly dead grass under it).
Try to leave the area in front of your wall site open to lay out your landscaping stones. This way you can spread them out to see what you have to work with.
Remember we talked about the big picture when it comes to planning?
Make a plan for any equipment you have to bring in your yard. Heavy equipment will groove your lawn so be prepared to repair it as well. You may have to take fences apart, so make sure you have no valuables that may disappear from an open yard. If the equipment is tall, make sure you won’t take down any power or phone lines.
NOTE: Always keep children away from the area.
Be considerate with close neighbors by letting them know what you are doing. Piles of dirt and gravel around the street can be hazards to them and their children.
There is so much to think about at this planning stage and one can
never remember it all. My goal here is to have you
thinking, “what about this?” and “what about that?” Hopefully this will
save you some time and grief.
Now that you've planned your wall site, let's head to the shed and get the tools you'll need!
_____________________________________
Table of Contents: Dry Stack Stone Wall
Introduction: Dry Stack Stone Wall
A. Wall Site
B. Wall Tools
H. Chinking, Completing Wall & Clean-up
______________________________________
Return to Dream Yard Home Page from Wall Site
Check out our time and money saving e-book

How to avoid the biggest mistakes made by DIYers, designers, and landscaping companies.
Visitor
Favorites


Giggles 'n' Thoughts
