F. Stacking Stones
Stacking stones is the next step in building stone walls we are going to cover now you have your base stones ready and stable. Try walking across them. Do they move or wiggle? There should be very little, or no movement at all (No movement at all is the goal).
I do this with every level of stones in my walls. It’s a good test to ensure that things are solid and tight. Each level of stones can also be referred to as a tier.
If you do have tiny bits of movement you can tighten things up with shim pieces as you go.
When you are all done we will get into some chinking, but for now it’s time to do some stacking.
Welcome to section six of building a dry stacked stone wall. If you are just joining us, we have the links for all the previous section at the bottom of the page.
We felt it was important when building stone walls to talk about about how to stack the stones. So this section will be devoted just to stone stacking.
 |
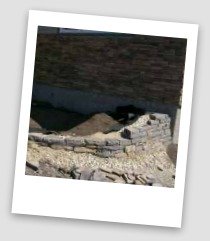
Back fill with each course of stones The back fill actually makes up part of your wall by supporting the stones from behind, just like your sub base supports your wall from underneath. When these two things are combined with a properly stacked wall with a batter to it, they all work together as one solid unit. Think of a how strong a tripod is? We will get into wall batter shortly, but a well built wall is similar to a pyramid. When your base layer of stone is down you can back fill behind this first layer. Shovel your back fill material in behind the base stone until it is just about level with the base stones. Pack the stones with a hand tamper. |
Now you are ready to stack layer #2.
If you are stepping your wall at the ends, start you second layer of stone staggered in from the edge of the first stone. Make sure the first stone of the second tier overlaps the gap between base the first two base stones. (Stacking stones is 1 over 2 and 2 over 1.)
Your focus will be to have a stone covering every joint on the base course of stones. This is not always going to happen and that is ok. You can occasionally have two joints on top of each other, but try to do this as little as possible.
This is called a running joint and takes away from the structural stability of the wall.
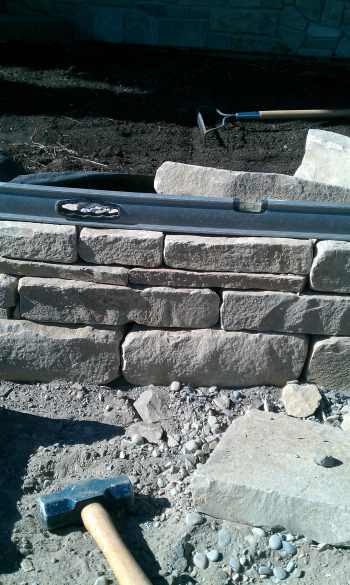
Wall Batter
This picture clearly shows the batter of the wall where it connects to the concrete foundation of the house. We started the wall flush at the bottom, but it is about 6 inches further in at the top.
Earlier I mentioned the batter. This is not the guy that is going to hit a home run. The batter is an angle, or lean into the bank.
We talked about a tripod theory so here is how it is completed. Your gravel sub base supports the bottom, your back fill supports the back, and this batter actually supports the front as an opposing force leaning back into the wall.
The batter should be about 5 to 10 degrees, or about 1 or 2 inches for every foot of height. The batter angle can vary a little bit depending on the purpose of the the wall. A retaining wall will need a strong batter, while a garden wall will need just a slight batter.
Landscape bricks are much easier to work with. They are a manufactured product, and the batter has been engineered into the way they are built and interlock.
When you started your base stones you used your level so they sat level from side to side along the length of the wall. From front to back they may have sloped ever so slightly to the bank. Now you can offset each stone to maintain a consistent batter for each course of stone.
Facing up stones
The FACE of the stone is the side that everyone will see. Facing your stones is a technique that allows you to shape the face using your chisels or brick sets and a hammer. If you have already determined that you have a very brittle stone, this may not be an option for you.
Try to have the face with the best character and natural appeal facing out. Sometimes the way the stone is shaped this may not be possible. This is where we can actually face a stone to make it more appealing. (Once again, try practicing this technique with a lesser quality stone that you may not use in the wall.)
With your safety glasses on, (nag nag nag) take the stone and secure it (under your foot preferably) and place the edge of your brick set on the piece you want to knock off. Give the end of the brick set a good hit with your hammer.
More stone stacking tips
When you are facing up stones or knocking off edges to make stones butt against each other, save the broken pieces in a pile for fill in and shim pieces.
When you are stacking stones for your layers I suggest standing back from the wall from time to time and looking at what you have done so far. How does it look? Do you have running joints? Is it level?
Sometimes you will look at partially completed sections and wonder if it looks ok or not? Have no worries, it will look fine when the other stones are filled in around it. (This can sometimes be a little deceiving.)
Stacking stones is like doing a puzzle. It’s a slow process and requires patience. You may have a 100 pieces laid out on your lawn and try half of them to see if one will fit. This is ok. You want them all to fit just right so be patient, and it will pay off for you when you are done.
You will get better at scanning the shapes and sizes and where to put them as you go. This is a learning process and you will develop your own way of doing things as to what works best for you.
If you have a stone that doesn’t quite rest on the spot you are working on, try sliding it across the other pieces in the wall, and maybe you just may find the perfect spot for that stone elsewhere.
It’s also ok to bounce around a little bit and work on different areas. If not, you can get stuck on a certain spot and get frustrated. Move away to a different location and come back there later.
This is also where you can start using your fill in pieces, sand and shim stones. (The sand is good for stabilizing). Try to have a good variety of different thickness pieces on hand. If you have a stone that doesn’t sit level, add a shim piece of the appropriate thickness to make up the difference.
 |
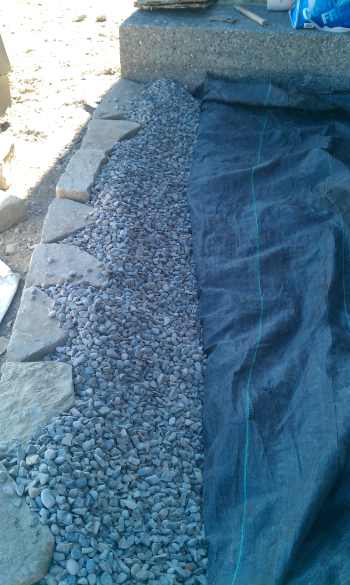
Use your level frequently to stay on course Use your level on every stone that you place in the wall. The advantage of this is being able to quickly recognize when a section of your wall is losing it's "levelness". (Is that a word? Hmmm must be because it wasn't spell checked.) This will allow you to make adjustments accordingly before you get too far off track. If you are using landscaping fabric behind your wall, when you add back fill behind each layer of stones, add some dirt in behind the landscape fabric. The fabric is going to curl up and around the back fill, and be tucked in between the last layer of stone and the capstone. If you are using any drain tile or perforated piping behind your wall, it should be no higher than the top of the first course of stones. |
If you use perforated drain tile with no fabric to keep the soil and gravel separate, wrap a landscaping sock around the tile to keep it free from debris.
Using stringers, anchors and tie stones effectively
Always try to mix up the wall as much as possible. By this I mean don’t put too many smaller stones together in one area. Try to place your stringers at different sections in the wall, and different levels as well.
Occasionally take a stringer and turn it the other way to make it extend into the bank making an anchor stone out of it. Mixing these stones at different levels and spots along the wall, gives it strength and stability.
Hopefully, by now you are getting the hang of it. Unlike manufactured products, a natural stone wall takes considerably longer to build. It may be necessary to walk away from the project from time to time for mental break. When you come back to it, you will be fresh and ready to go again.
After you have a few levels complete, stand over top of your wall, and look down at the face. Check the batter, and also check to see if you have a nice even face on the wall.
Keep a block of wood handy and use your 3 or 5 lbs hammer to make minor adjustments. Do this by striking the block as it sits against the face of the piece you want to shift.
Depending on how many tiers you are going to have in you wall keep in mind that the last level will require some planning to accommodate the cap stones you set aside earlier. If your capstones are fairly equal in thickness, you can start leveling the last tier in preparation for the caps.
If you have any double thickness capstones you may have to incorporate these into the second last layer so they have the same height as the other capstones.
If you need to, make yourself a final height guide. Drive a stake in the ground at either end of the wall and tie a piece of string between them. Guides like this one for the final wall height, and even batter guides are useful, but they tend to get in your way when you are working.
Sod or grass up to the capstones
If you aren’t using landscape fabric, and you want grass right to the edge of the capstones, you can stop filling with back fill about five to six inches from the top of the capstone height.
This can be filled with topsoil after the capstones are in place, so sod will have something to root into at the edge of the stone. Just be aware that this area will be prone to sinking as the soil will migrate over time into the back fill.
If you are using fabric, you can finish back filling your wall a minimum of 4 inches from the top of the wall. You can also cut off any excess fabric now, and the fabric can be tucked under the second last course of stones and glued down if you like.
So, it took you a long time to get here, but your wall is looking great, most of the stones are gone, and hopefully your back is still holding out. Now you are looking at the biggest, heaviest ones of the bunch.
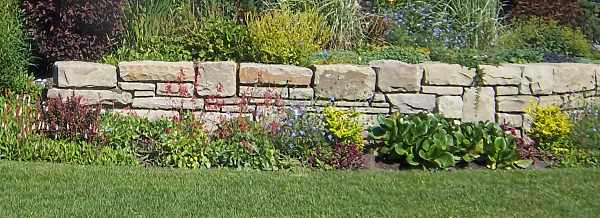
You have finished stacking stones, you are ready to cap the wall.
_____________________________________
Table of Contents: Dry Stack Stone Wall
Introduction: Dry Stack Stone Wall
A. Wall Site
B. Wall Tools
H. Chinking, Completing Wall & Clean-up
______________________________________
Return to Dream Yard Home Page from Stacking Stones
Check out our time and money saving e-book

How to avoid the biggest mistakes made by DIYers, designers, and landscaping companies.
Visitor
Favorites


Giggles 'n' Thoughts
