C. Materials for
Flagstone Walkway
Estimating materials for flagstone walkway projects can be a challenge for do-it-yourselfers. Landscaping techniques, cost, and the availability of materials can vary greatly depending on the region you live in.
We are going to look at how to estimate your needs, as well as help you select the right products.
Stones can have different names depending on the quarry they come from. This can sometimes be confusing when you read about different materials in a book, or on the internet, and you can't find someone that knows what you are talking about at your local supplier.
They may have it, but call it something different. We always try to be as generic as we can describing materials to avoid this confusion.
The amount of materials you need will also will also vary depending on the climate you live in. For example: sub-base requirements for southern or tropical climates, will be less than those for northern climates. Northern regions require deeper sub-bases to deal with drainage and frost heave.
What hardscaping products do landscape supply yards sell? how are these products sold, and shipped? At Dream yard, we visited a landscape supply yard so we could show you what's available. Gravel, decorative rocks, stone, edging, are just a few of the things we will introduce you to in this informative article estimating materials.
If you have more than one stone supplier in your area, then shop around to see all that is available to you. Spend some time in their supply yards and ask lots of questions. Rainy days are best for "pre-shopping", because they will have more time for you.
Ask for product brochures, price lists, and any other info they may have for you. Ask what reputable local landscapers are using for materials to build similar projects as you will be building. Remember to have a notebook with you before you venture out for any shopping.
One more thing to note for new do-it-yourselfers is there is always more than one way to build a project successfully. Do what will work best for you and your situation. We can show you how to do things, but the materials will have to be done with a bit of local research.
You can also check with your local government to find out what their engineers specify for bases under roads and other projects in your area.
From visiting different suppliers, you may find that landscapers use different products under their flagstone walkways. One may use a ¾ inch crushed washed rock with 1 or 2 inches of sand on top, and another may use only crushed limestone. Your decisions will sometimes be based on your budget, and what is readily available in your region.
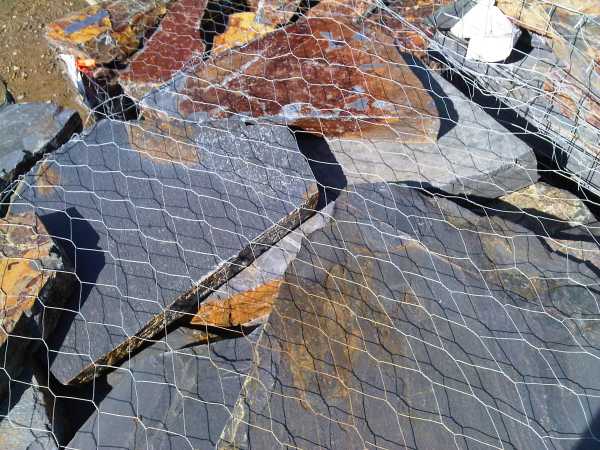
For beginners, the flatter the stone, the easier it is to stabilize into your base. Look for the best pallets you can. They should allow you to pick your own pallets or stones. Stones with the flattest surfaces on both sides makes things a lot easier (this is what you are paying good money for).
I have found that the well stacked and neat pallets have less junk hiding in the middle or bottom.
Inspect as many rocks as you can by walking around the pallet. Look for consistency in the thickness as well. This can limit the amount of base adjustments when you are laying them.
The larger the stones, the faster the work will go. Larger stones are usually more stable, but there are down sides to using the big slabs. You will have to choose stone that you can handle and place yourself, or with a helper without hurting your back.

Inquire about a landscaping yard's return policy. You may have some stone left over to return when you are done. You may have about 5% to 10% in wastage. This is normal. The more experienced you are with working with stone, the less waste you will have.
If you had a large order delivered and find a pallet has a lot of junk on it, ask them if you can return or exchange it. (This doesn't mean pieces that you have broken, trimmed, or split.) Lesser quality surface stones can sometimes be used for stepping stones, or other projects in your yard.
Some stones have a different geological composition from the way they were formed. They may not all be that easy to work with when trimming, splitting, or shaping. Make sure your don't have this problem by picking a stone that is not brittle.
Picking the right stone means having something you can work with. This will allow you to knock off edges and corners
without damaging, or shattering the stones. (There is a great video on working with stones later on in this module.)
If you are building a walkway with larger gaps between the stones, this will not be an issue to you as you won't be doing much shaping. You should also be aware of iron or other minerals in the stone, and the effects it may have on plants or surfaces like concrete.
Try
to find something that is consistently in stock, or a regular
product line. This is in case you didn't order enough, or want to add to
it later. (Stone yards can sell discontinued stock like any other store.)
Try not to use stones that are less than 2 inches in thickness for a dry-laid flagstone walkway. (Minimum 1 ¾ inch is ok.) If the stones are too thin, they can crack very easily if something is dropped on them. I do know landscapers that use thinner stones for dry-laid projects, but I don't recommend it.
Estimating Stone
This is not an exact science, as stones can vary in thickness and density. (This is another reason why I had you enquire about a return policy.) You will need to measure the length times the width for the square footage of the surface area.
Don't forget to include the extra width in your estimate for supporting any edge restraint. A patio surface may be 3 ft. wide, but the base will have to have an extra few inches on each side to support whatever edging will be installed.
Over the years using different stones I have seen coverage range from 70 sq ft/ton, to as much as 100 sq. ft./ton. I generally use an average of this formula. (1 ton of 2 inch stone will cover approx 80 to 90 sq ft.)
Using 90 sq ft per ton looks like this:
120 sq ft walkway divided by 90 sq ft = approx 1.3 tons of stone. (Round this up to 1.5 tons)
The stone yard should be able to verify this from your measurements, as they are more familiar with the stones they are selling. The local landscapers usually give feedback on how much coverage they are getting from the products. Don't forget to add 5% to 10% in wastage to this number.
Sub-base depth
North America and other parts of the world are divided into climate or hardiness zones. To find out how much sub base you will need, click on the link for your hardiness zone map, locate your region, and write down the appropriate number for the zone you live in. Then refer to the chart below for the recommended depth for your sub-base.
Hardiness Zones: AfricaHardiness Zones: Australia
Hardiness Zones: Canada
Hardiness Zones: China
Hardiness Zones: Europe
Hardiness Zones: Europe (East of Moscow)
Hardiness Zones: Japan
Hardiness Zones: New Zealand
Hardiness Zones: South America
Hardiness Zones: United States
| Pathway Type | Hardiness Zone | Sub base Depth |
|---|---|---|
| Dry-laid Pathway | Zones 2-6 | 8" compacted gravel |
| Dry-laid Pathway | Zones 7-10 | 4" compacted gravel |
| Mortared Pathway | Zones 2-6 | 10" compacted gravel |
| Mortared Pathway | Zones 7-10 | 8" compacted gravel |
| Gravel Pathway | Zones 2-6 | 4-5" compacted gravel |
| Gravel Pathway | Zones 7-10 | 3" compacted gravel |
This is a great guide for you to use, but we also recommend verifying this with your local suppliers or landscapers.
Gravel, sand and crushed rocks, have a slightly different formula and are usually sold by the cubic yard. To estimate the amount you require you will need to know the cubic feet of your excavation area. Length times width times depth in feet. This gives you the cubic feet of area.
Divide this number by the magical conversion number of 27, and this gives you the cubic yards required. Remember that you will have a 2 inch layer of crushed stone or sand on top. This is your bedding material and uses the same formula.
You will also have to divide the number of inches in depth by 12. (There are 12 inches in a foot) This will give you the .5 in the example you see below.
Example: An area that is 40 ft x 3 ft with a 6 inch deep sub-base:
40 ft x 3 ft = 120 sq ft x by .5 (half a foot) = 60 cubic ft
60 divided by 27, gives you 2.3 cubic yards required for the sub-base. (Round this to 2.5)
Stone yards don't usually sell anything less than ½ yards unless they have weight scales to charge more accurately. Rounding up on your estimates an extra 5 to 10% will cover you from running short.
This extra material will also cover the need to extend your sub-base materials an extra 4 to 6 inches outside your walkway edges for proper support.
You may need edging along the sides of your walkway where it connects to transition zones or grass. It will keep the stones in place and keep grass from migrating into the stones. There are different kinds of edging available, so talk to your landscape supply yard, they will recommend the proper edging for you.
Spiked in edging is one of the most popular and stable supports. The edging I use is sold in 7.5 ft lengths, so measure the outside edges of your walkway before you go to the yard. It won't matter what lengths they sell when you have measurements. You won't need any edging on side being built up against a house foundation, or any other solid feature.
For jointing between the stones, you can use different materials. Polymeric sand seals the joints from water and weeds, resists washouts, and is quite popular to use.
You can also use a fine crushed material from the stone yard to brush into the cracks, but it will not have the same sealing qualities of polymeric sand. It can also be washed out in a heavy rain. They should have different colours available for you in both, polymeric and crushed products.
Polymeric sand is not something you can just skim over the top.
It must cover to a depth of at least 1 ½ to 2 inches. If not, it won't be as effective. (Read the package on coverage.) If the joint size between the stones of your walkway is greater than 2 inches, polymeric sand is not a good choice. You may want to consider mixing your own polymer with a larger aggregate.
Now you have all the tools and materials that you will need to do the job, it's time to move on to the next stage of preparing the site.
Introduction: How to Build a Dry-laid Walkway
B. Tools for a Flagstone Walkway
C. Materials for a Flagstone Walkway
D. Preparing a Flagstone Walkway Site
E. Preparing the Base for a Flagstone Walkway
F. Laying and Packing Stones for a Flagstone Walkway
G. Flagstone Walkway Edging and Jointing
H. Walkway Completion and Clean-up
Return to the Dream-yard Home Page
Return to "The Yard": Landscaping How-to Modules
Check out our time and money saving e-book

How to avoid the biggest mistakes made by DIYers, designers, and landscaping companies.
Visitor
Favorites


Giggles 'n' Thoughts
