D. Flagstone Patio Site Preparation
Flagstone patio site preparation is where we cover all the things required to get the site ready for the sub base. Let's go over a few things before we get dirty.
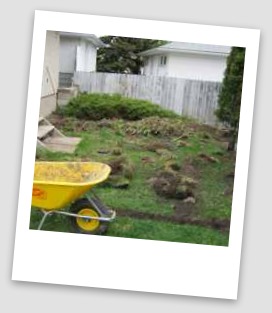
At this stage you should have a permit (if one was required), your utilities marked, and your excavation area marked with landscape marking paint. You are ready to dig.
Cutting a perimeter
I always found it helpful before excavating the main area to prepare the perimeters first. This includes cutting your edges with a sharp edging tool or a good square nosed shovel.
This prevents damage to bordering lawns and other features. Heavy equipment like bobcats and excavators can easily tear lawns or damage walkways, driveways, or other features.
Having the perimeters already cut down the depth of a shovel blade and cleaned out will prevent this damage. This step may take me half an hour or 2 hours, but it has saved me thousands of dollars over the years.
If you are installing edging, don't forget to excavate wider than the planned surface area as the base will have to support whatever edging you install.
How far down should I dig?
The industry has developed guidelines according to climate zones around the world that tell us how far down to go.
Let's say you are in Alaska and you need an 8 inch gravel base while someone in southern England needs a 2 inch gravel base.
Remember that these are only guidelines.
Dig down as far as is needed.
Of course, this is within reason. There are other methods we use to compact subsoil that are also adequate. Try to hit a clay base or very hard packed dirt. This is called the subsoil. You typically shouldn't have to dig down more than 8 inches to reach harder packed soil.
Once you remove the topsoil (the upper 2 to 8 inches of soil), you will usually be into clay or hard packed dirt.
If you have dug down 8 or 10 inches for your recommended depth and it is still soft, keep digging. Try to see if you can hit a more solid base. You may be only a few inches away from clay. I have never had to dig down more than 12 to 14 inches to hit a solid enough base to start with.
Its definitely better to start from a good hard subsoil base than trying to pack in soft soil. Gravel is usually pretty cheap, and more is better.
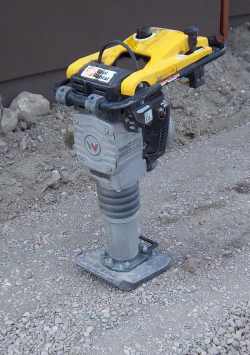
You can also rent yourself a jumping jack (like this one to the left) for packing in subsoil and your sub base. This has quite a bit more compacting power than a plate tamper.
A jumping jack is a great tool to have around for new construction homes with unsettled grounds.
Also, the importance of having a well packed sub-base will allow the patio to bear more load on the surface, while reducing possible movement from frost heave cycles in northern climates.
Planning and being efficient
It is also important to plan your sub-base according to adjustments you may have to make around your patio. You may be raising or adjusting it for soil, sod, or drainage reasons.
If you are raising your patio higher than existing ground levels, you can subtract a portion of this from your excavation amount. This might be tough if you have soft soil and you may just end up having to add more gravel to your requirements.
Landscaping lights, irrigation lines, or any other feature you have planned for the present or future should be considered. It would be difficult to bury underground lines of any kind once the patio is built.
If it is a small patio and you are excavating it yourself, than I suggest you rent a sod cutter to remove the grass first. This is way more efficient than trying to dig out a lawn with a shovel.
You can rent these at most rental centers. (Make sure you are clear on how to use it before leaving the rental store). A sod cutter will peel up the grass, a little bit of dirt, and the roots.
Also, keeping sod and dirt separate may save some of you dumping fees for separating sod from clean fill (like I do). Have someone ready to put utility marks or flags back exactly where they were if you pull them out to use a sod cutter.
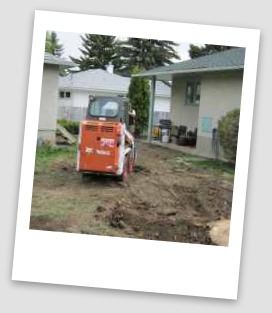
If you have someone do your patio preparation for you with heavy equipment, make sure they know where any utilities are too. This is especially important if you have in-ground irrigation, phone, cable, and electrical lines.
Gas lines are usually buried further down. Utilities lines like phone and cable can be pretty close to the surface where they enter the house.
The perimeter should also be excavated a few inches wider than the planned patio size. Your base support needs to extend a little further than the edge of the stone. 4 to 6 inches is plenty, and if you need to plant grass up to the edge you can clean a bit of this gravel out later after your edging is spiked in.
Leveling and Staking
Laser leveling is great if you know how to use one. Drive your stakes into the ground around the patio area and in the center making a bit of a grid (6 to 8 ft or so apart). Leave about 2 or 2 ½ feet of the stake sticking out of the ground.
Use your laser level to shoot the beam across the stakes. Mark a line on each stake. (This will be considered the level mark for all stakes). You should be able to eyeball the high end and the low end already.
When you have all your marks on you stakes you need a plan how to drain water off the surface. This is achieved by running a grade. A grade of 2 inches for every 8 ft. is normal. Now you can adjust your marks on the stakes by raising or lowering the marks according to where you want your water to leave the patio.
On the stake at the lowest side or end, mark where you want the top of your patio to be. You can now dig down from here 2 inches for the stone, 2 inches for the sand, and the required sub-base depth of gravel for your region. Let's say for example, that your sub-base requirement was 6 inches.
You will be excavating down from the top of the patio mark, 6 inches for sub-base, plus 2 inches for the sand, plus 2 inches for the average thickness of stone (10 inches in total). To do this on all stakes, use a tape measure and measure down from the level mark you made on all the stakes. Don't forget to make adjustments accordingly for drainage as mentioned above.
String levels are another cheap and easy way to determine any grade and set your excavation requirements.
- Tightly tie some string around the stakes at each end of where the patio will be and place the string level on the string. The string should be just above the ground or grass across the proposed patio area.
- Have someone move the string up or down at the low end while you
watch the bubble.
- You can mark on them a LEVEL mark when the bubble is
level.
- Repeat this step from the first stake to all other stakes until you have consistent coverage of marked stakes in a grid around and in the middle of the patio area.
This probably sounds more difficult than it is. This season we are hoping to put together a series of videos to make things easier.
To make sure you are excavating to the correct depth, use string between the stakes and measure down from the string accordingly.
It may be a pain in the butt leaving the string up during the excavation process.
Take it down if you have to and use it only as a guide when needed.
Unlike a brick patio with consistent size bricks, a flagstone patio does not require a perfectly level screeded bed to start from.
The thickness of the stones can vary an inch or so in thickness.
You will have to adjust the sand or crushed rock base frequently to allow for this. You are welcome to use screed guides but with natural stone, they are really not needed.
If you have a lot of kids around you may want to drive some tall stakes in the ground around the site and tie some bright ribbon or caution tape between them to keep people away from your excavation area.
Make sure you are preparing for any other connected projects as you are excavating for the patio. Sequencing all your plans properly will save you time and money.
Happy digging!
After you dig, it's time to fill...let's move on to preparing your patio base.
_____________________________________
Table of Contents: Flagstone Patio
D. Flagstone Patio Site Preparation
E. Flagstone Patio Base Preparation
F. Laying Flagstone Patio Stones
G. Flagstone Patio Edging and Jointing
H. Flagstone Patio Completion and Clean-up
______________________________________
Return to Dream Yard Home Page from Flagstone Patio Site Preparation
Check out our time and money saving e-book

How to avoid the biggest mistakes made by DIYers, designers, and landscaping companies.
Visitor
Favorites


Giggles 'n' Thoughts
