D. Edging Site Preparation
The next step in this how-to module is edging site preparation. It's time to put on your boots and gloves, and get a little dirty.
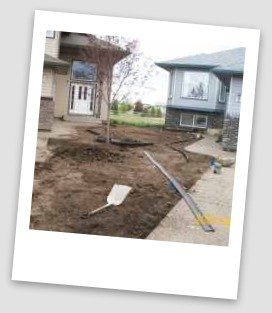
This is the start of physical labor, so let's go over a few things before we get at it. You should have a permit (if one was required), your utilities marked, and you have your excavation area marked out with a landscape marking paint.
You probably won't be excavating down deep enough to worry about utilities, but it's better to be safe than sorry. When I install rock gardens, landscape fabric, and edging, I am usually more concerned about cutting into irrigation, or lighting lines. We mentioned earlier about a sod cutter.
This is the type of project when they come in handy. A sod remover will cut out the grass, roots, and a little bit of dirt with it. (The depth is adjustable on these). This will allow you to roll the sod up and set it aside to be discarded.
For any project where you are removing lawn, set the height of the sod stripper low enough to remove an inch or 2 of soil with the roots.
These tools save a lot of time by eliminating digging with a shovel. You can rent these at most equipment rental places. Make sure you are clear on how to use this before you leave the store.
With any excavation area, it helps to hand dig out the perimeters with a square nosed shovel. This has two advantages.
- You will have the proper depth exposed around the whole area; and
- You tend to have less damage and tearing to existing sod from the edges of machinery.
A recommend depth of about five to six inches for the first two or three inches from the perimeters will give you extra depth to install edging. The rest of the area should be around four inches deep.
If you put down a thin layer of decorative rock, you will be disappointed down the road. Your landscaping fabric will be exposed and you will have to order more rock to cover it. Don't skimp on materials. Have enough rock for sufficient fabric coverage of at least three inches.
Here is a helpful video on how to remove sod.
If you are mounding your beds in the middle then you can save yourself some excavating by altering your digging depth accordingly. A mounded bed "Presents" your gardens better from any angle, and drains water more effectively.
You can pre dig your holes for larger trees, perennials, or landscaping shrubs you are planting in the rock or mulch bed. Make sure you dig the right size hole as recommended by the nursery. This will make things easier later on in the install. It will help keep the landscaping fabric free from soil and other debris.
Note if you pre dig holes: You will have to be careful when your holes are covered with fabric that you don't step in them.
Drainage
If you can't visibly see a low spot where the water will drain, then you may have to use a leveling device to plan your drainage.
There are some easy methods to use to do this quickly.
Place some stakes into the ground in your excavation area, and tie some string between the stakes. Place a string level on the string and have someone move it up and down for you from the end you think is lowest. By watching the level, it will show you which way your grade will run.
You can also place a garden hose in the area, and turn it on briefly to see where the water runs. (Don't put in too much water, or it will make a muddy mess to work in.)
If you use plastic edging around your rock/mulch beds, you may have to drill holes in it to let water drain out.
That's it. There really isn't a lot to preparing rock beds. Just clean up and excavate what you need based the finished height you want for your rock bed. People have asked if they have to remove the grass too? It depends on your situation. Grass will not grow through heavy industrial polypropylene landscape fabric.
Now that you have finished your edging site preparation it's time to
get ready for installation.
_____________________________________
Table of Contents: Edging and Decorative Rock
Introduction: Edging and Decorative Rock
A. Edging Site
B. Edging Tools
C. Edging and Decorative Rock Materials
D. Edging and Decorative Rock Site Preparation
E. Installing Edging and Decorative Rock
F. Edging Completion and Clean-up
______________________________________
Check out our time and money saving e-book

How to avoid the biggest mistakes made by DIYers, designers, and landscaping companies.
Visitor
Favorites


Giggles 'n' Thoughts
