3. Sodding Over Grass
Sodding over grass is one of the more risky ways to repair a lawn. You should never seed or sod directly over existing grass without considering some kind of preparation work to increase your chance of success. We will go over these tips later in the section.
First things first. If you have diagnosed your current failing lawn with soil problems, than we do not recommend sodding over a lawn.
This method is for people with good soil conditions, or people repairing small sections or patches.
Remember that if you have not yet taken care of the soil problem, then the grass problem most likely will return.
Your lawn may look great for a season or two, but will deteriorate as soon as the roots from the new sod grow down to the old poor soil. (This happens to plants all the time with poorly prepared garden beds).
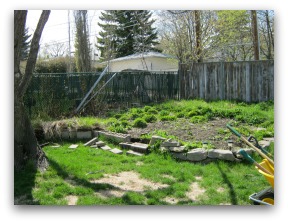
Multi-tier lawn full of weeds and severely damaged by dog urine ready for a makeover.
I have heard this statement a few times over the years, “But the people next door did this, and their lawn looks great?”
Maybe so, but this is misleading. No two situations are ever the same.
Give it a few years and then see how it looks. It takes a few years for a lawn to prove itself, so only time will tell.
You also have to consider the difference in soil conditions. Their soil may have a completely different composition than yours. This in turn means different results from your efforts.
We have mentioned before that landscapers get their materials from different places. This could mean your soil came from an hour north of the city, and theirs came from an hour south.
We don't want to scare you off trying this method if you have a very limited budget. After all, it can save lots of money. There are homeowners and landscapers that do this on a regular basis with no problems.
We just want to point out pros and cons, so you are informed of the risks before you begin. Don't expect a high long term success rate. Unless you are prepared to do at least some prep work.
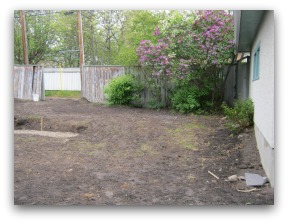
The weeds, a dead tree, and a falling over cinder block wall were first removed for this makeover.
You can improve your existing soil from the surface over time with topdressing and aerating.
Adding a thin layer of compost each year will slowly and continually improve your soil, as it works into the existing soil.
This can do wonders for your lawn, but is a slow process. Visit our mini-module on Aerating Lawn for more info.
We talked about other additives in the tilling section, and provided this link to our friends at the Lawn Care Academy for some other ways to deal with clay soil. If you missed it, here it is again.
The Lawn Care Academy: Clay Soil
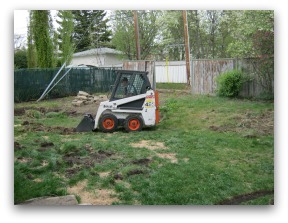
Bobcat removing damaged lawn where tree was removed from.
All the soil and lawn in this yard did not have to be removed for this makeover.
A thick layer of sod including the soil that is attached to it may also affect the height against existing features.
You may have to make adjustments for the 2 or 3 extra inches you will be installing in your yard.
Irrigation heads are just one of those adjustments you may have to make. If you are seeding, you will won't have to worry about it. If you already have a decent soil base then renting a sod stripper may be an option for you.
A sod stripper will remove the existing grass with a small amount of soil attached to the roots. This is usually a few inches depending on the machine and the height you have it set at. The advantage to sod removal is you can maintain the same lawn height when your new sod is laid.
When using a sod stripper be careful of irrigation lines and sprinkler heads if you have them. You also should be careful if you have buried wires for lighting, cable, or phone. These can be very close the the surface. (Especially near the house.)
After using a sod stripper, the surface will accept the new roots of the sod much easier. You will also have a much smoother lawn. This is a great time to add your starter fertilizer and a layer of organics, even if you have good soil.
If you don't use the sod stripper, you can mow the grass to the lowest possible height before dethatching. The clippings can be bagged, or left on the ground. Next preparation step should be to use a dethatcher.
Use a flail type dethatching machine to prepare the surface by scarifying it.
Base preparation for lawn replacement.
If you have a heavy layer of thatch, running a dethacher will help with more than just breaking up the surface for the new seed or grass roots.
Thatch creates a barrier that prevents water, oxygen and other nutrients from penetrating into the soil.
This can also impede root growth when the new sod roots drop into this barrier.
Dethatching with a flail type machine will remove the thatch. If the height is set right, it will also scarify the existing soil surface. (Break up the surface). This will allow better seed to soil contact, and easier penetration for both seed, and sod roots.
The best time to do this is usually in the spring when the ground is the softest. If you have a very hard dry surface, you may have to soak the soil to a depth of 4 to 6 inches. Let it dry up for a day or so after this before you begin.
After dethatching, add a layer of quality soil, compost or other organics with your starter fertilizer. The amount you add will depend on your existing soil conditions. You can then rake this layer smooth to prevent any unevenness of the sod when you lay it out.
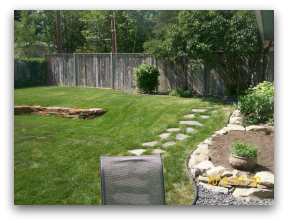
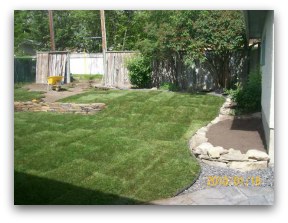
Completed yard after lawn was replaced.
For seeding or sodding small patches you can use a bow (steel tine), or a dethatching rake for roughening up the existing soil.
This will have the same effect as a dethatching machine.
You always want to ensure good seed to soil contact, and make sure the roots can penetrate the soil. Don't forget to visit our sections below when you are ready to seed or sod.
We encourage you to give us feedback about this article. We can only improve with your help, and we would be happy to add any tips you have from your lawn repair experience.
We have added some shortened versions with some seeding and sodding tips taken from our full modules below.
______________________________________
Table of Contents: Lawn Problems
C. Lawn Repair
E. Replace Lawn
H. How to Sod
______________________________________
Return to the Lawn Problems Introduction
Go to Dream Yard Home Page from Sodding Over Grass
Check out our time and money saving e-book

How to avoid the biggest mistakes made by DIYers, designers, and landscaping companies.
Visitor
Favorites


Giggles 'n' Thoughts
