How to Install Flagstone
How to Install Flagstone is a "Tricks of the trade" article to help homeowners complete their project like a pro. In the previous section we covered helpful pointers for selecting the right type of flagstone for you project, so now you are ready to lay the stones.
If you stumbled on this page before having your base prepared, you may want to visit our how-to's on building a walkway or flagstone patio. You can find the links for these and other projects in the side bar.
This section was designed to provide advanced tips and techniques for those having trouble working with flagstone.
We want you to be able to fit your stones together with even gaps, while maintaining a surface free from excessive variations.
You should have some basic tools before you begin. Here are the basics shown in the picture below to help you get started.
Once you have your tools, we want you to do some practice work with some junky pieces that you are sure won't be used in your project.
Try knocking off some corners and edges, or reshaping a few stones using your hammer and chisels. We want you to get the hang of what the stone will do when you hit it.
This is the time to learn and make mistakes when it won't cost you anything. Destroying a good piece of stone when you have them all placed can cost you considerable amount of time.
If this happens you will have to work in a replacement stone which often mean working the adjoining stones around it again. This will put you at risk to break even more stones.
 and a large pry bar.")
From left to right. Whisk broom, 4 ft. level, 2 stone chisels, a 3 lb sledge hammer, a pry bar, a claw hammer, a rubber mallet (dead blow hammer) and a large pry bar.
One of the main reasons why people opt to build with bricks or paver stones is because of how much faster the work can be done. I have spoken with some landscape contractors that actually steer away from natural stonework because it is not as profitable for them. They can build four brick patios in the time they could build one flagstone patio.
For beginners, estimating your time is a big challenge when laying patio stone. You are better off not setting any deadlines. It takes what it takes you to do a quality job. If you rush, your work will suffer. There are no shortcuts when laying flagstone patios.
Most people seem to have a pretty good handle on how to get started placing the stones. If you have ever built a jigsaw puzzle, you should be able to place stones in a patio. Unfortunately, there is no picture on a box to refer to, and the pieces are not all cut to fit. This means there will be times you will have to create your own shapes to fit.
Placing stones
Two frequent questions I get are:
- “Is cutting flagstone required?”
- “Where do I start?”
You don't have to cut the stones, and building your edges first allows you to select the larger and more stable pieces to be placed where you need them. You may want to consider larger pieces to be placed where people will be entering your project from a deck or patio, or maybe under a BBQ.
If you don't have a good saw with a
proper stone blade, placing your edge pieces first will allow you to create a nice clean line without cutting any flagstone. Once you have all your edge pieces laid out,
you can then start filling in the middle.

Keep in mind this is not the only procedure for laying out a stone walkway or patio.
This is meant to be used as a guide that will work. We all develop our own methods as we go, but still end up with the same result.
If you do lay out your edge pieces first like this picture, there are two things to focus on.
First, try to create a nice smooth flowing line with the edges touching each other.
This will help keep your jointing material of sand, crushed rock, or polymeric jointing sand from washing out the sides.
The second thing you should consider is the shapes you leave on the inside.
Are they going to be easy to match up to with other stones?
Every single stone laid must be done in a way to accept the other pieces.
Don't leave yourself awkward or multiples angles that are difficult to fill in. (You will see exactly what I mean when you are laying your stones.)
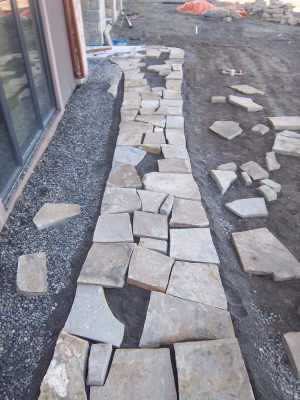
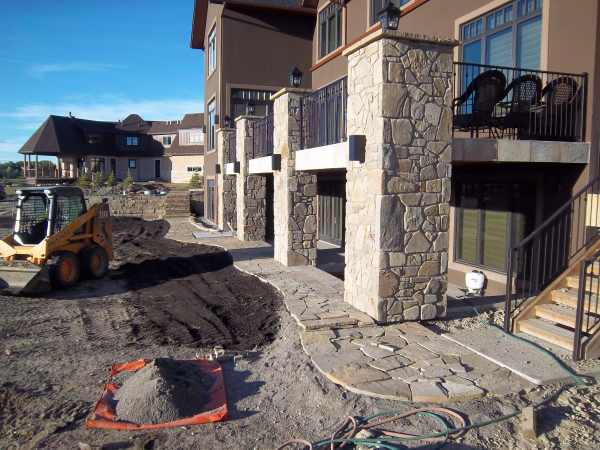
We added this picture to show you how this walkway is filling in, and the importance of the setting up for the next stones with every one you lay.
The time and care you take placing the stones throughout the process will determine how much shaping, trimming, cutting, and splitting you will have to do to finish off the proper gap sizes between the stones.
If you ever find yourself at a level of frustration in the process at any time, walk away, take a break, and come back later with a fresh mind.
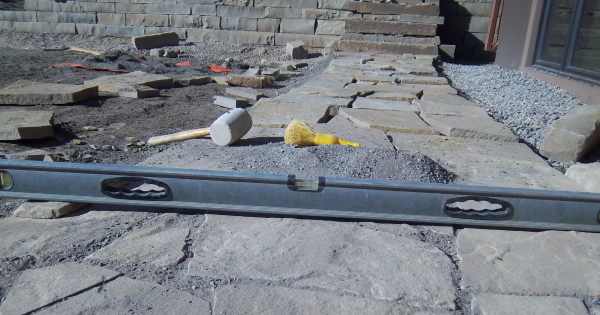
If you notice below in this overhead picture of a small section, the gaps between the stones are fairly consistent.
This is only a 3 ft wide walkway, but the gravel base is few inches wider on each side to support the edge stones. Always make your base wider than your walkway.
If you are installing edging you may have to make it even wider. (3 to 4 inches for plastic edging, )
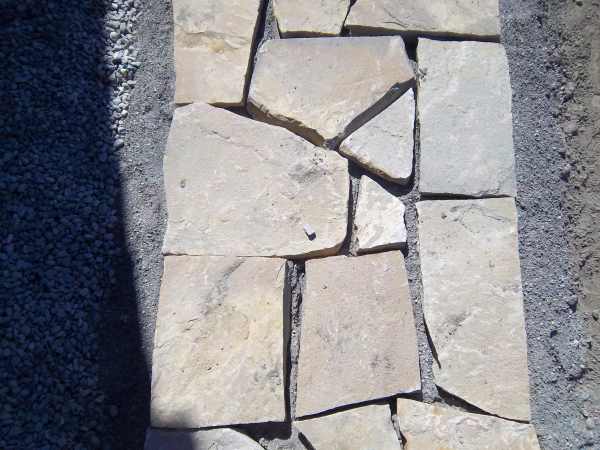
In the picture above we did have to knock off a few pieces to achieve consistent gaps between the stones. This is where your stone chisels will come in handy and hopefully you did spend some time practising like we mentioned earlier.
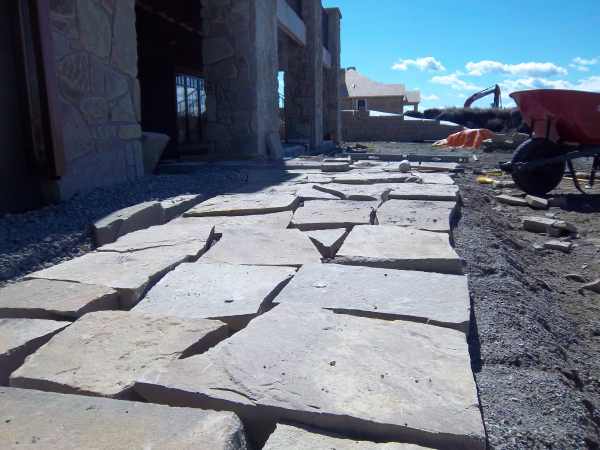
Below is a cross-section view of a walkway after the stones have been placed showing the variations in thickness. These stones will all be worked into the base by adding or removing the bedding sand or crushed rock so you are left with a smooth, level surface.
Note again in this picture below how the sub base extends a few inches wider than the walkway for proper edge support and installating of plastic edging.
Working with Stones
It can be challenging to match each stone to those that border it while not throwing off your over all grade. We mentioned that stones that are warped, twisted, concave, convex, and wedge shaped wll contribute to this challenge. We also talked about stones with rough, broken, tapered edges and high ridges.
Now we have some great ways that we can work with these stones.
This stone in the picture below has a warp that will present a challenge. In this case you have four options of how to deal with a stone like this.
Option #1 is to keep it aside and not use it. (If you have enough stones to do the job).
This stone could also be used in a garden bed as a stepping stone.
Option #2 is to balance
imperfections with the surrounding stones so each side of this stone
will have the same variation where they meet.
For example:If this stone had a 1/2 inch twist from
one side to the other, you could take up the difference by leaving a
1/4 inch variation on each side. This is simply “splitting the
difference”.
Option #3 If the stone is warped too much to split the difference, break the stone in half where the largest part of the twist is.
Most people don't consider this, but it is a great way to deal with stones that are heavily twisted, concave, or convex. If you can split this in the right place, you will now have two stones that are almost flat.
Option #4 is to work with the joining stones so you don't have a tripping hazard by knocking off high and low spots.
This is also how we take off ridges on the surface of the stone. We mentioned that the surface variations should not be more than 1/4 inch, so this is how we work within those parameters.
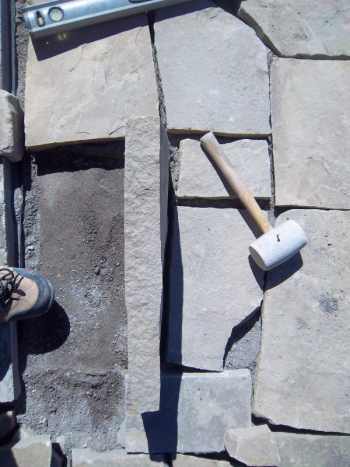
In the two pictures below, we are going to work with a stone that actually had an undulating surface. We were still able to work with it, while giving you a good understanding of what we mean in option # 4.
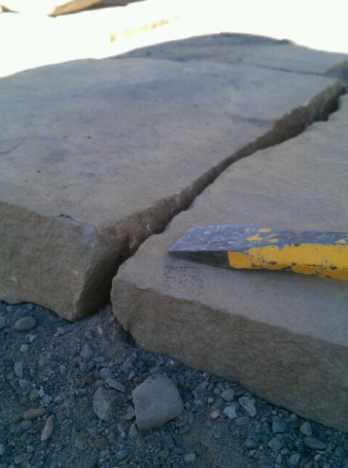 Place your chisel against the piece you want to trim off, and give it a good hit with a 3lb sledge. This technique will take some practice to get the hang of so I suggest you practice on a spare piece of stone before damaging good ones. The other thing to be aware of is you will dislodge the stones if you have just set them, so don't fully set a stone you may have to work with. |
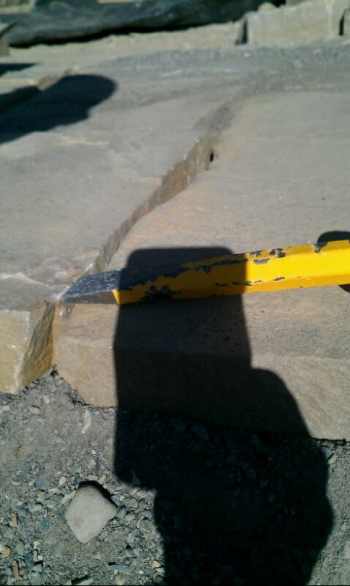 Same stone as the one to the left, with the two stones now having a matching height. We have just eliminated a potential tripping hazard. I should give 10 bonus points for anyone that can identify the phone I used to take this picture. (I guess I am not a photographer). |
In this next picture below, we are working at setting the stone into the base. As you can see when we lift a stone they are not perfectly smooth on the bottom. This one is pretty close though. To stabilize a stone, the impression of the bottom of the stone must match the impression in the sand.
Working with crushed rock will be a little more difficult for beginners than working with sand for a bedding material for this reason. The crushed rock will have less give then the sand.
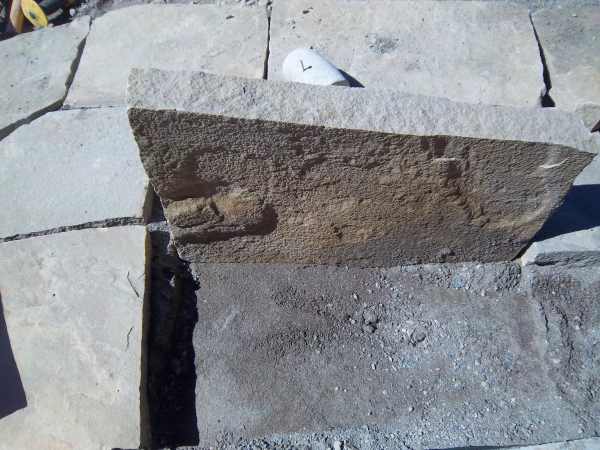
In this picture above, you also have to option of knocking off the chunky piece seen on the bottom of the stone here.
You can work a stone from side to side, front to back, or strike it from above with a dead blow hammer (rubber mallet). You will have to experiment with what method works best for you.
You may also have to lift nearby stones and temporarily set them aside to work a stone into the base. This is normal. Just remember how the stones were placed so you don't forget.
It is possible to crack a stone from striking it too hard. If this happens, just separate the two stones like they were meant to be there. Cracking stones with a rubber mallet is often the result of striking them too hard when they are not evenly supported under the stone with sand.
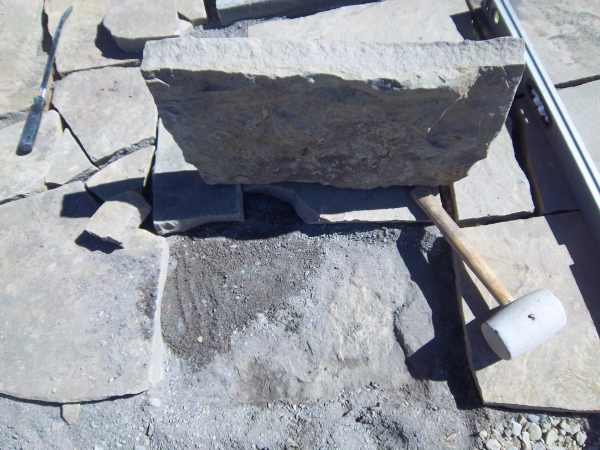
This stone above has a little more of a challenging bottom. You can see the impression of raised sand on the right side to match the piece of stone that is missing.
You will have to add sand or take it away from the appropriate places to set this stone well. It is not unlikely to find a few of these in a pallet of stones. They work just fine, so long as you are patient when you work with them.
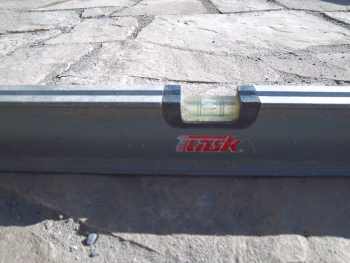 |
Make sure you keep your overall grade by using a 4 or 6 ft level. You should check the level with every stone in every direction. It is very easy to stray off course. Remember that it will take less time to double check your grade than it will to go back and re-work a section of patio or walkway. If you look closely at this bubble, it is slightly touching the line to the left so we can drain water off the walkway. |
In this next picture we placed a 1 inch stone on the left to show you the grade for draining water. This 3 ft wide walkway has about a 1 inch drop from one side to the other.
Working my way along this walkway, I packed in some crushed stone as I went. This is a new construction job and will be more prone to settling, so I would not pack in polymeric sand until the following spring. There is also a high risk of possible frost heaves. This was a low point in the yard that held water before we had a chance to improve drainage and grade the yard.
This sand can easily be brushed out and replaced once you are sure no further settling will occur. You can then add a jointing sand of your choice. If you do use polymeric sand, make sure you sweep out at least 1 3/4 to 2 inches. If polymeric sand is applied too thin, it will not be as effective and stable. You will usually find this manufacturer's information on the bag.
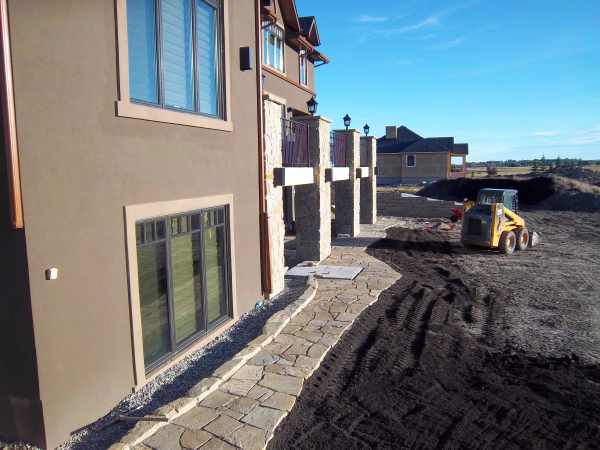
On the inside of this walkway we used a border of stones and decorative rocks against the house to keep things neat. The whole walkway had some edging installed and was bordered by a hydroseeded lawn.
We did not cut a single stone to finish this project with some nice flowing curves. We will have these pictures available for another project on Dream Yard.
That's if for this module. Our original
goal was to teach a few advanced skills in working with flagstone. We always
seem to cover a little more than we originally intended, but we
really felt it would be of great value to include the previous section on How-to Buy Flagstone.
It sure makes things run much smoother when you have the right materials.
So hopefully, you were able to pick up
on a few skills from this module. Please pass this along to anyone
else you feel may benefit from this information. If you have any
questions please Contact Us.
Thanks so much.
The Dream-yard Team
Table of Contents: Advanced Flagstone Tips
Introduction: Advanced Flagstone Tips
Go to Dream Yard Home Page from How-to install Flagstone
Check out our time and money saving e-book

How to avoid the biggest mistakes made by DIYers, designers, and landscaping companies.
Visitor
Favorites


Giggles 'n' Thoughts
