A. Edging Site
Effective planning for your Edging Site is very important. Rock or mulch beds may not be overly difficult do-it-yourself projects, but they still require some initial planning.
Changing or altering designs could cost you time and money if you overlook important details in the planning stage.
It's a great idea to have a sketchbook handy for drawing out plans, and taking notes.
Here are some things to consider.
1. Designing
I'm sure at this point in time you already have an idea in mind? Maybe you are renovating an existing project? Perhaps you are replacing some dead or winter-killed grass with a more effective and practical landscaping idea?
Easy landscaping ideas like this can be done by anyone, transforming large areas of your yard into low maintenance beds very quickly.
For the beginner, it is best to keep things simple when it comes to landscape design. Designing is actually a whole course in itself and takes years to master. You can always add to your designs down the road.
Here are just a few do-it-yourselfer tips for some guidance.
Informal designs often have more flowing curves and work better with natural hardscaping products like flagstone.
Straighter lines (formal designs), are more suited for working with manufactured products like bricks and blocks.
Keep in mind that if you use plastic edging, it is easier to curve it, than run it in straight lines.
Mix up your design with different colors and textures. Repeating color and textures gives a nice flow and rhythm to your design.
Keep things in proportion. Make sure you have the right sized features in relation to the rest of your house and yard. For example: if you use edging and rock beds to compliment other features, make sure they don't overpower what they are complimenting.
If you are planting trees or landscaping shrubs, make sure you are aware of the mature size. You don't want to hide any important features because a tree or shrub grew more than you planned.
There are some great and affordable landscaping design software programs out there for homeowners. It may be worth the small investment to have a design that works well and looks great.
Practical Thinking Tips
Always think practically when you are designing your yard. It has to make sense for maintenance, as well as enjoyment and visual appeal.
For example: consider mowing in and around your edging site and trimming as well. Make sure the curves or corners are mower friendly. (Don't grow a strip of grass between the edge of your project and a fence that is not wide enough for a lawn mower.)
Landscaping under a tree can actually be a tricky thing to do. Grass usually struggles as it is in direct competition with the tree for moisture, nutrients and sunlight. Decorative rock and mulch beds are a great alternative for these challenges.
Remember as trees grow, so do their root systems.
If possible, try not to build over buried lines or cables. Projects built over these areas may need to be dug up for repair some time.
If you are using landscape lighting, now is the time to make a plan. You may have to bury your power lines unless you are using solar power.
When you are playing with ideas on shapes and size, use inverted marking paint to paint out your ideas on the ground. You can also use a garden hose or rope.
Edging and decorative rock are considered a cheap landscaping idea. The upfront costs are often higher than other ground covers, but the long term maintenance costs are low.
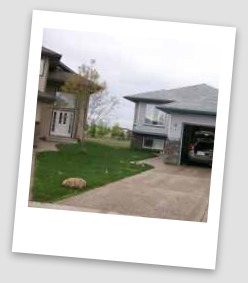
I always like to see neighbors work together. (picture) In this example both neighbors came together and split on the cost to save money. They now both have a balanced front yard that was appealing from the road.
Approach your neighbor with your ideas. Sometimes you can combine your efforts to save you both money. You can sometimes split on the rental of equipment, and the cost of materials.
Working together along fence or property lines to co-ordinate projects also allows you to plan swales for drainage.
Make sure you tackle your landscaping projects when it is dry. If you don't, you risk the mud and dirt sticking to the bottom of your boot's or shoe's, and getting tracked onto the fabric. Fabric should always be kept as clean as possible.
Think about future plans in your yard and how this project may affect them.
There are many things to consider that are specific to your edging site and your situation. We never remember or think about everything that we can, but we can sure cover a lot. Our goal at this site is to have you thinking like an experienced landscaper. Proper planning will save you time and grief down the road.
2. Excavating
Since you may be doing some digging, I should mention a few things about excavating for a landscaping project.
You must be aware of dumping fees in your area so you can truly estimate all your costs. Some cities charge a fee for this.
They may want you to separate the sod from the clean fill (dirt). In my city, it is $85 per ton for dumping anything other than clean fill, this includes sod, and only $3 per ton for clean fill.
You may need an approval permit so I suggest you call the city or the landfill site to find out your local rules and fees.
You probably won't require heavy equipment for this particular project because you will only need to dig down about four or five inches. I would suggest renting a sod stripper if you have to remove any existing lawn.
Plan your work to the weather when excavating, as heavy equipment can make a mess in the rain.
3. Be aware of all utilities and lines that may be under your proposed site.
Underground gas lines, power lines, cable, water, phone, sewer, septic systems, buried drain tile can all cause you grief. These things may cause you to alter your design if you can't work around them. ALWAYS call before you dig. Most regions and countries have an 800 number or other, to call for free. They will come out and mark the utilities with flags and/or landscape marking paint for you at no charge. This may save your life.
If you have in-ground irrigation, make sure you call your service company to map out where your lines are. (These can easily be cut with a shovel.) They may also want to make changes to the system and zones to benefit you. If you are planting in and around you project, they may want to install some drip irrigation to feed water to what you are going to plant.
4. Understand which forces of nature may affect your site.
This means that you should know the drainage of your yard from rains and building downspouts. If this is not an issue for you, great. If it is we will deal with this later in the construction stages. Also be aware of any trees and root systems, both present and future growth.
5. Planning for materials and equipment.
Planning for materials and equipment can save you lots of time. I have on many occasions had to move things more than once costing me time and money. When you are working with different materials it's important to have a plan on paper, where you are going to keep them.
If you are going to use the lawn put down some heavy duty tarps, remember that anything on the grass for a number of weeks may kill it. If you are having products delivered make sure you are home when the truck comes. (Otherwise they will just dump it anywhere, unless you tell them exactly where you want it.) Leave enough space to allow a wheelbarrow track between any piles of materials.
Make a plan for any heavy equipment you have to bring into your yard. Heavy equipment will groove your lawn, so be prepared to repair it. You may have to take fences apart, so make sure you have no valuables that may disappear when your yard is open. If the equipment is exeptionally high, make sure you won't take down any power or phone lines.
I know this seems like a lot to cover, but we really do want you to be aware of all the things that can be overlooked. Hopefully, we have now changed your mindset.
Now, that you have the site chosen,
let's head to the shed and get your tools.
_____________________________________
Table of Contents: Edging and Decorative Rock
Introduction: Edging and Decorative Rock
A. Edging Site
B. Edging Tools
C. Edging and Decorative Rock Materials
D. Edging and Decorative Rock Site Preparation
E. Installing Edging and Decorative Rock
F. Edging Completion and Clean-up
______________________________________
Return to Dream Yard Home Page from Edging SiteCheck out our time and money saving e-book

How to avoid the biggest mistakes made by DIYers, designers, and landscaping companies.
Visitor
Favorites


Giggles 'n' Thoughts
