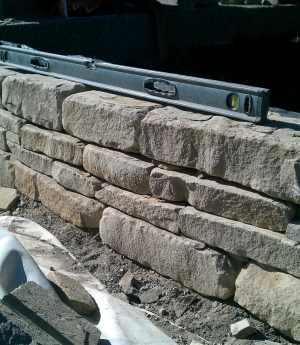
G. Capping Stones
Using capping stones to cap a stone wall can have its challenges. These are the biggest and heaviest stones that you have to place. You should have a helper for this step to make it easier.
Welcome to section seven of building a dry stack stone wall.
If you are just joining us, links for the other sections can be found at the bottom of the page.
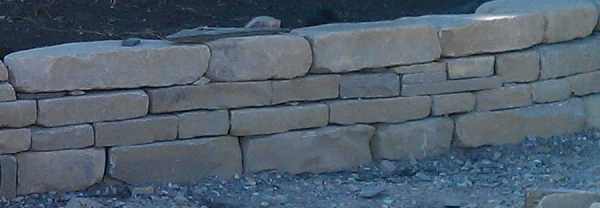
What you are trying to achieve when capping a wall is to maintain as consistent a height and width as you can, while having the stones butted up against each other.
Make sure that you have done a good job preparing the previous courses of stones, for the capstones and that it is fairly level.
This is also a good time to install any low voltage landscaping lighting or solar landscaping lights for the top of your wall. Try to do this before you finish your back fill so you can bury the wires. Solar landscape lighting can be placed in between or behind the stones anytime.
Before you set your capstones or use any landscape adhesive, you should have a final placement for each one. Do the whole wall first, then go back and glue them if you are happy with everything. This is much easier than having to change anything after you have glued the stones.
With two people, start from one end working your way across the top securing them. If you are using landscape fabric, you may find this to be a bit of a pain to work with but well worth the effort when it’s done.
When you have the capping stones all placed but not secured this is the time to face them if required. Place them on the ground to do this. (Trying to work with stone while it is in the wall can create more work for yourself if you aren’t careful.)
Placing the cap stones is the same as any other course of stone in the wall. Try to find the best spot covering two joints that you can. By this time you should also be better at working with you filler and shim pieces. Use these to stabilize the cap stones.
|
Don’t worry too much about having them perfect, because you will be lifting them up again to apply glue. Check your levels before placing your capstones. Make sure you have the face with the most character facing out. Stand back and look at the wall for one last final approval before you glue the caps down. If you are happy, you can start at one end securing the capping stones with your adhesive. Pick up the capstone and flip it on its top on the ground in front of the wall. |
You can now take you fabric and lay it down (or glue it if there is a stone wide enough under the capstone you are placing) apply adhesive to the bottom of the cap, and to the wall where it will be touching.
Sometimes you can glue shims before the cap is on if you know exactly where they are going.
With two people, flip the cap back over and place it in its spot making sure the back edge of the stone is just covering the fabric (this can be tricky, so be patient). Shim it and stabilize it. Put weight on all corners to make sure it has no movement and move on to the next cap.
Work this same routine across the whole top of the wall taking as much time as you need. This can take a few hours or longer even for experienced workers, depending on the length of the wall.
Remember that people and kids will walk across this so make sure all the capstones are very stable.
Now is the time to stand back, or sit back and have a nice drink (water of course), and take in your work with pride and accomplishment. You are almost done.
You have finished with your capping stones, let's move onto completing your wall!
_____________________________________
Table of Contents: Dry Stack Stone Wall
Introduction: Dry Stack Stone Wall
A. Wall Site
B. Wall Tools
H. Chinking, Completing Wall & Clean-up
______________________________________
Return to Dream Yard Home Page from Capping Stones
Check out our time and money saving e-book

How to avoid the biggest mistakes made by DIYers, designers, and landscaping companies.
Visitor
Favorites


Giggles 'n' Thoughts
